Now, where were we? Having ripped off her bodice and applying a soothing poultice, we left our heroine recovering, drying in a safe place:
I'm fascinated by the fact that bookbinding, far from being a gentle art, is actually quite a rough, energetic pasttime, and much of the terminology is very physical: we smoothed her down, trimmed her clean, knocked up her shoulder, rounded the headband, padded up her spine, wrestled with the bookcloth, boned her all over, blocked the case, cased her in.
Phew! Let's take that again, slowly, and with visuals:
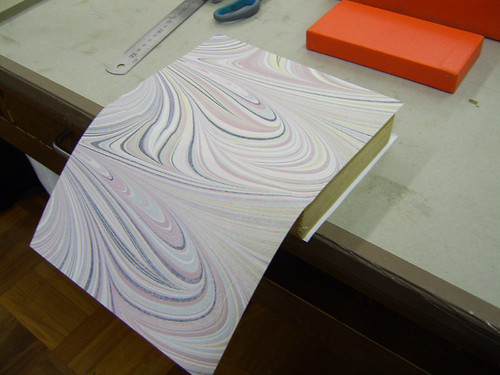
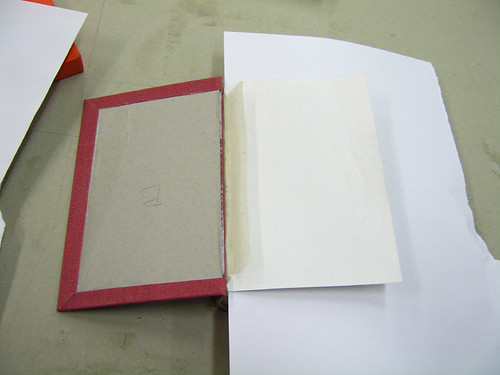
I put a bit more of the paste on her spine, to soften her up a bit after a week's rest (if I'd done it all in one session I wouldn't have needed to do this), and then wiped it all off and smoothed it down. Then I tipped in the endpapers, which are the pieces of paper that attach to the hardcover on one side and the bookblock on the other. If this was a really swanky job, I would have used something very expensive, or even hand-marbled, but since it is just a bit of fun and my first time, I used pre-printed commercial reproductions of marbled paper. You only glue a strip of about 5mm on the folded side of the endpaper, and then press it firmly on the spine side of the bookblock for a few seconds. They can be oversized, because after this the whole bookblock gets trimmed. You can't see the marbling in this photo, because the paper is folded with the pattern in, so that you see the pattern as you open the book.
See?
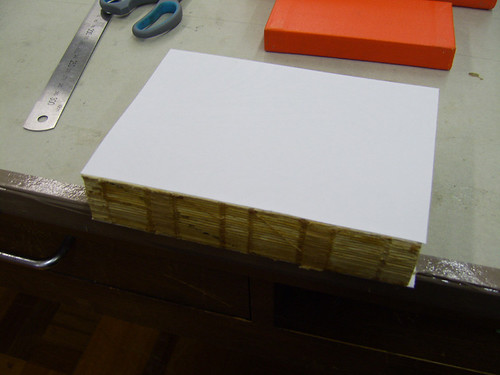
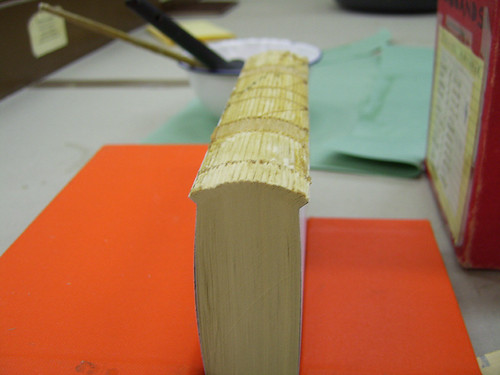
After this she is taken to the book guillotine, but not to lose her head. Just to be trimmed a few millimetres on three sides, to clean her edges and make her look fresh and young again. Like a skin peel, I suppose. She transforms from a yellowy dirty colour to a fresh milky complexion.
Now comes the exciting bit, where we get to bash her with a hammer! Young leddies like Georgette aren't supposed to sit straight and square, they need rounded shoulders. So Neale (this is his hand) showed me how to use the special hammer (blunt tail, flat head) to whack the spine whilst in a vice, to form the shoulders, thus:
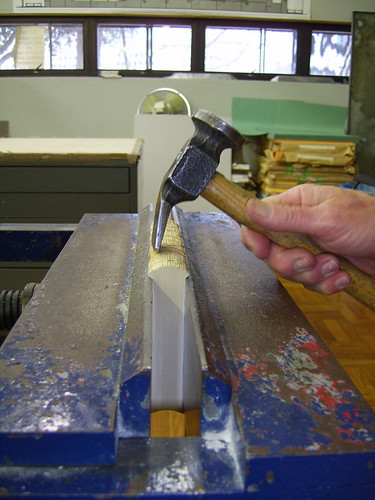
None too gently, too. And not so that they're too large and dominant (she's a lady, remember). And thus the bookblock looks like this:
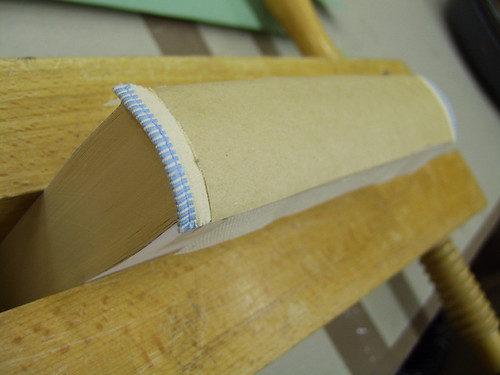
Now we start trimming her undergarments. A dainty headband, and aso tailband, to make her look her best at all times. I chose a pale blue and white design. Many of the headbands you can buy today are just thread wrapped around a core of thread, but the ones at my bookbinding class are solider and probably more old-fashioned, thread wrapped around a core of cane. Since I'm used to the floppier version, I just cut some pieces from the reel and stuck then on. But no! I got my knuckles rapped for this, and was shown The Right Way.
The WRONG way. Bad headband.
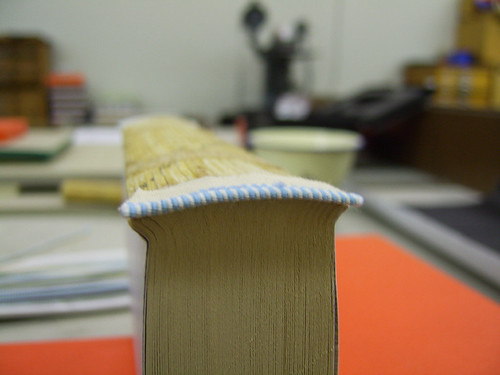
The RIGHT way. Good headband.
Can you tell the difference? One has been stuck on without care and is flat and lifeless. The other has been zipped across a blade, like when you curl paper, to give it a bit of curl, and sits happily, even jauntily, along the curve of the newly-rounded spine.
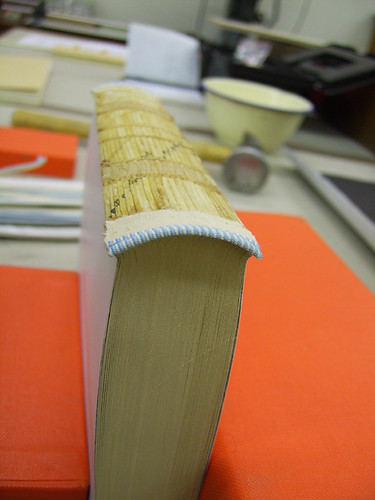
And there you are. Head and tail bands, just glued on either end (carefully!). Now for the various paddings and linings, just like any lady's underlayers.
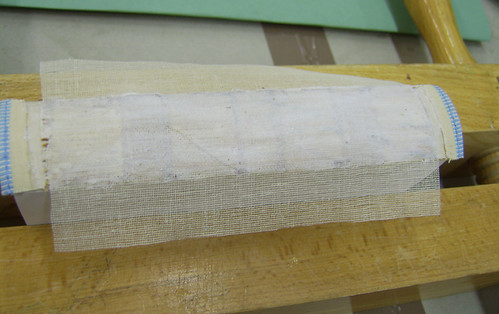
Muslin. So Regency, darling. It's a stiffened muslin, which in bookbinding terms is called 'mull' and in printmaking circles is called 'tarletan'. For years I'd thought mull was something you had to order from specialist suppliers, and then I realised I'd been using it nearly every day at the art school. [digression: Neale (my bookbinding teacher) had no idea why I would snigger every time he said to 'mull up' the spine. Bless him.]
Anyhoo, you place the mull between the ends of the headband. We're trying to build up the level of the spine so that no one will see the headband layers or the spine tapes through the case (or cover). So the headbands are one layer, the mull makes that layer complete, then we'll add a layer of crisp brown paper the same length as the mull but only the width of the spine. The mull will be wider, because it will be part of the bit that attaches the bookblock to the cover.
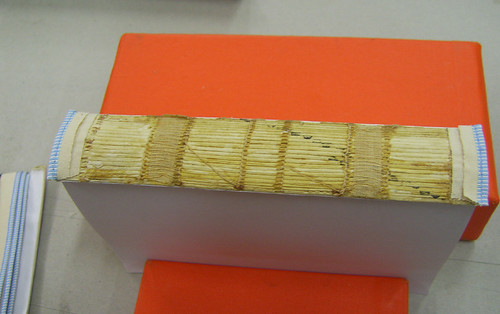
Just that nice thick paper you sometimes get around packages and bulk paper deliveries. Not if it has a waxy or glossy finish, because that will resist the glue. Of course, if I was doing the truly archival thing, I'd be using acid-free card, etc. If I did that here, the cover would last longer than the pages inside it! I used two layers of brown paper this length, and then the last goes all the way along, over the headbands and everything.
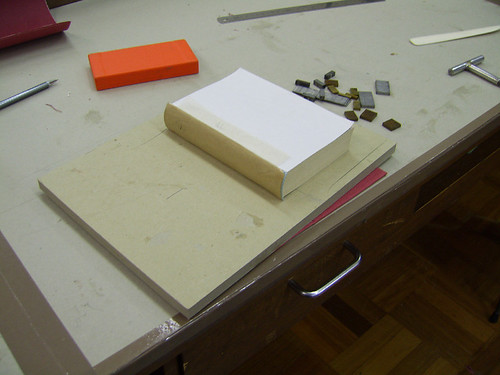
And so here she is, clad in only her undergarments, waiting to be clothed properly. I'd just set the spine text, hence the odd bits of type lying next to her. But I'm getting ahead of myself.
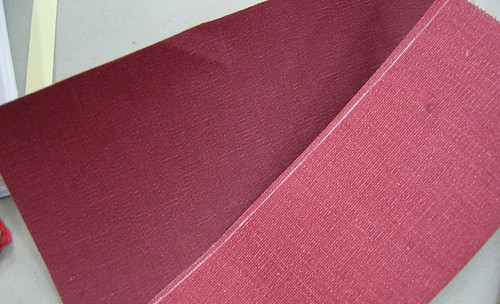
Laura asked the other day what differentiated bookcloth from other cloth. Well, it takes a lot of glue to attach cloth to boards, and ordinary cloth looks dreadful when the glue soaks through it. So bookcloth has a lining on one side, of either coated paper, or just an acrylic coating, so that the glue sits on the layer and stays away from the publicly visible surface. You can make your own bookcloth by laminating it with thin Japanese paper (something I've been meaning to try for ages and I'll let you know when I do it).
In this case (above), I'd been eyeing off a roll of dusty rose-pink cloth with a large weave that made me think of period costumes. When I cut my piece of it, I saw to my dismay that the colour I liked was actually the BACK of the cloth, and the front was a darker, plasticky texture. Yuk. But Neale assured me that I could use this particular cloth in reverse, as long as the outside coating (which would now be the inside) would allow the glue to sit without breaking it up like oil on water.
So I did use it. It was a battle, as I had to get the glue to spread nicely, and the cloth was very thick and had to be very physically wrangled with a bonefolder around the edges of the cardboard, but it worked! See:
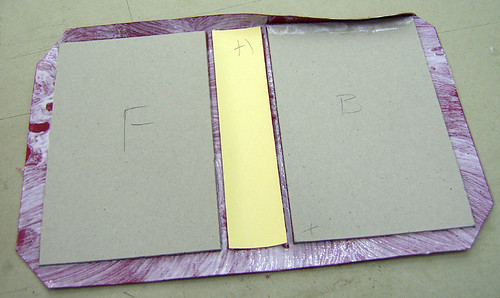
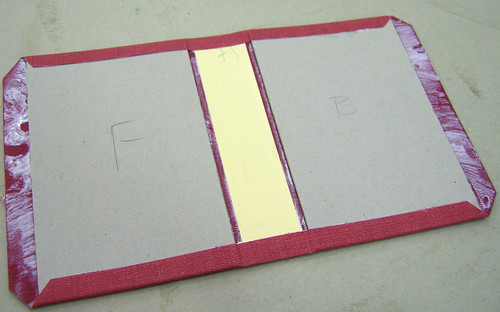
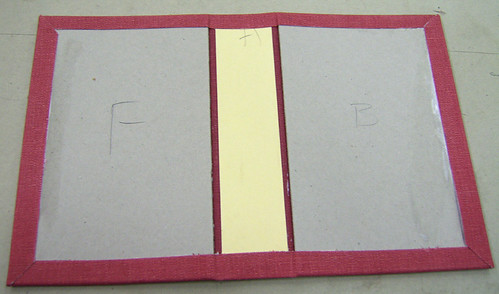
Hooray! A quick press in the Nipping Press and all is good. Note that the centre strip is different from the boards. It's just thick paper or very light card, because that's all you really need once the cloth is on. It makes the spine malleable, and easier to open and shut. Also you'll notice that we've marked all the bits in pencil. Thats because the case is custom-made to fit the newly trimmed block, and each side is unique, and well, it all helps. Nobody will see it under the cloth, so why not be good to yourself?
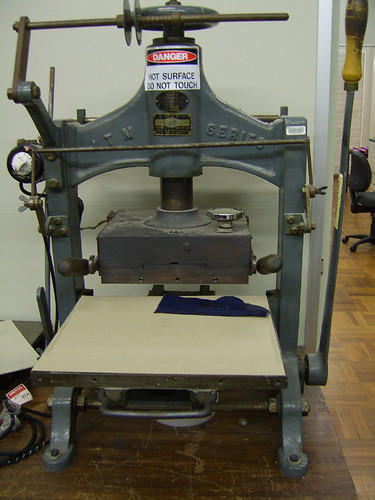
This is where Georgette gets tattooed. This is the blocking machine (can't remember if there's a more technical name). You set up the letterpress, clamp it up in the machine's frame and it sits, upside down, heating up to a certain hot heat.
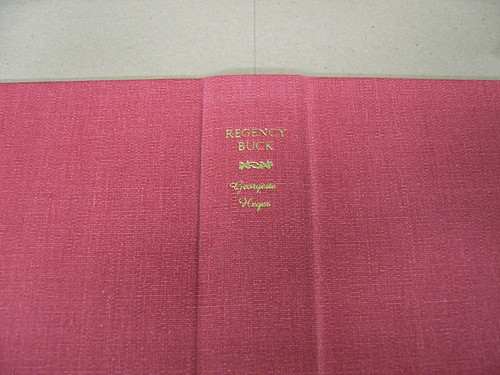
After a few practice runs and a bit of registration marking, you set the book cover in the right spot and lower the lever for a second or two and...
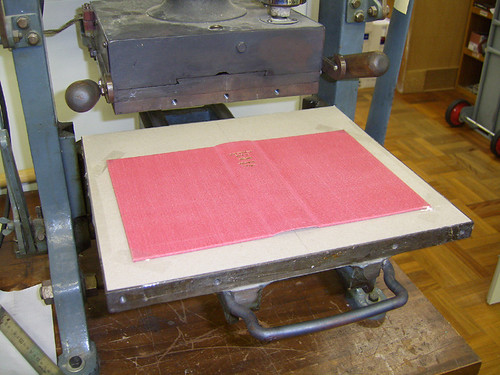
Hey presto!
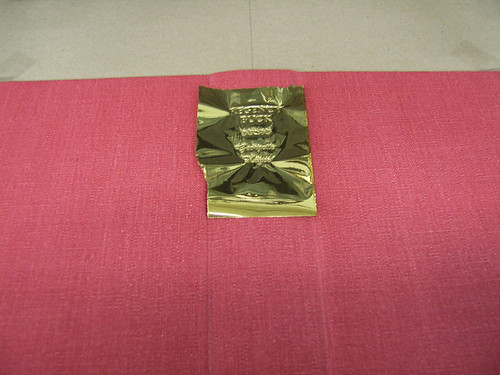
I used gold foil (of course!) but there are many other colours. Here's what the foil looks like (after stamping).
Here's the foil afterwards, held up to the light:
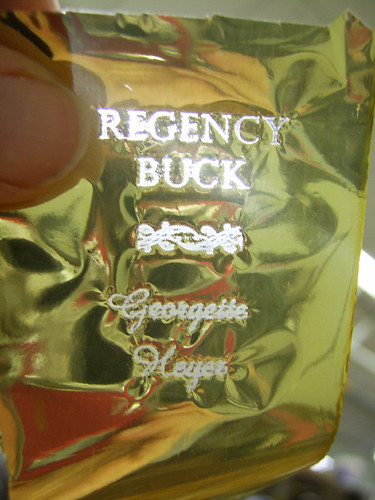
And here's a close-up of the text I designed:
Peeling the foil off is a lovely feeling, like peeling off one of those facemasks, or glue off your finger.
Once the cover has been blocked, you can attach it to the bookblock. I'm sure Georgette was grateful to be dressed.
As you can see, the mull is poking out, and if I hadn't cut off the crappy old tapes, the booktapes would be poking out too, trimmed to the width of the mull. I've put a piece of waste paper between the endpaper sheets, and now I'm about to paste the endpaper, from the centre outwards, then close the book cover tightly and carefully onto the endpaper, give it a quick nip in the press and then flip and do the same to the other endpaper.
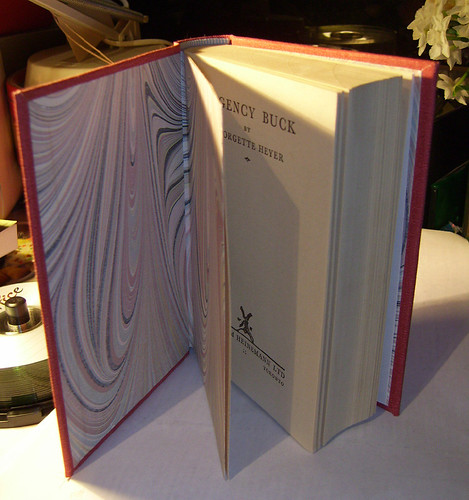
VOILA! A rejuvenated Regency Buck, ready to sit in splendour on my book shelf.
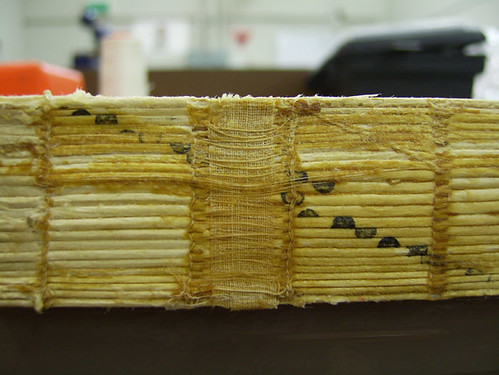
Let's have a look at that headbandy goodness yet again. I love this view of a book.
Ahh. Splendid.
If you want to see the whole set together at flickr, follow this link.
18 comments:
Wow, what a terrific post, and the book looks beautiful. So the endpapers are basically all that holds a cover onto a book? That and the snug fit?
Thanks for taking the time to write it all up. Very, very enjoyable reading.
My pleasure! Yeah, but it's the combination of endpapers pasted over the tapes and mull. Makes a pretty secure fastening, but if you want to take a book apart, you start by ripping off the endpapers.
The Johnsons are in awe of you.
Wow. Wow wow wow. That was the most fantastic educational post. I loved it, and I live in envy of your talent. I like that fabric that you ended up with for the cover. It seems to have a great texture too.
Thanks for sharing that, &duck. Being a bit of a geek, I used to wonder how it was done. Now I can say I have a pretty good idea. :)
Beautiful! Thank you for such a detailed post on a subject that has always fascinated me. I have experimented with binding my own books at home, but am such a novice at the whole thing. It is wonderful to see it done so well.
What an absolute treat this post was - I'm sure my mouth was hanging open as I read every last word and gawked at those photos. Thank you for spending the time and effort in doing this post.
One thing about cloth for books: have you ever used doublesided adhesive paper (jac paper) to line fabric? I've made handmade hard cover books with that and it works well. The Jac paper is first adhered to the fabric, then the backing paper of the other adhesive side of the Jac paper is removed, allowing you to then put on the bookboard. Have also attempted a soft cover with it but was only moderately successful. This method wouldn't work for what you were doing with this book of course, but just wondering if you've ever used it with handmade books. I'd like to do the traditional thing with Japanese rice paper too.
You should see some of the books my Dad's had a go at binding up. He's not a bookbinder, just a general man-about-the-house with, um, weird ideas about how some things work. I've got a book of Robert Burns poetry that used to have a crumbling paper cover; he replaced it with two WOODEN covers bound by leather. Actually holds together quite well, though it has mouse-trap-like qualities now; when you open it up to read, it tries to swallow your fingers.
Bah, next time I'll hang the expense and go to the bookbinders!
Just beautiful and fulfilling a few questions I hade about headbands and the like.
THankyou thankyou thankyou.
Is the mull glued to the bookblock before the boards are attached - or does it just get glued between the boards and the endpapers & reinforce the joins?
I think I understand this. It's also giving me a clue as to why hardbacks are so much more expensive than paperbacks.
What is the purpose of the binding arrangement where there is a band of cloth on the spine but the outer edges of the boards are wrapped in paper? Apart from looking nice?
(Can you tell I've been looking inside dustjackets?)
You have to hold the mull up while you glue the whole endpaper, and then the mull and tapes are pressed between the glued paper and the boards (so your latter half of the question is the right idea).
One form of that cloth strip/paper binding is in some cases called a quarter-binding; it's the old way of doing school text-books. It's a cheaper form of binding because the spine isn't built-up and the boards don't get wrapped, just trimmed, so there's less fiddly work. But this is the style that has raw cover edges when you look at the book from the foredge.
If it's cloth-spined and has fully wrapped boards, then I'll have to look up the technical name and I'm (as I write) pinned under sleeping cat (my right arm is in the right position to type but is otherwise a pillow) so I can't go and look it up. I think part of that is a cost-saving exercise; but could also be a decorative feature. Personally I plan to use that style for my planned printed books because I want to print my own cover paper. Apparently wallpaper is great for covering books too (Val!).
This post made my mouth water! Especially the pics of the gold lettering stamped on the leather. mmmm.
mmmmm loverly post Ducky :)
You know I love a bit of DIY, but all that lady talk got the two from Little Britain stuck in my head.
LOVERLY work dearie!
Oh so lovely and practical and informative! Not that I'm going to start bookbinding anytime soon, but I can admire the skill that goes into it.
what a fabulous post! i like making books, but i've never bound a book for real...really amazing beautiful work!
Hello, I found this site through a google search and am interested if you know anything more about the making your own bookcloth, right now I am using double sided heat transfer stuff to attach cloth to japanese paper but am curious as to whether there's a more organic but not too messy way to do it??
please email me if any of you know!!
kate
littlegreen@littlegreendesigns.com
www.littlegreendesigns.com
Post a Comment